
A vacuum cleaner that won’t switch on is a more common problem than you’d expect. Thankfully it’s often an easy problem to solve even without expert help. This troubleshooting guide should assist you in getting your vacuum back up and running.
1. Lack of Power
First and foremost, check the power. Make sure the vacuum cleaner is connected to a working power outlet and that no fuses or breakers need to be reset.
Also make sure that the power cord is correctly connected to the vacuum cleaner and that the rubber is not split. If the cord is damaged, it must be repaired or replaced.
2. Overflowing Bag
A full vacuum bag may prohibit the device from being turned on in some instances. This is because it restricts airflow. The vacuum won’t turn on in order to prevent the motor from becoming overworked and creating internal damage. Simply replace the bag to solve the problem.
3. The On/Off Switch Is Faulty
Over time, the on/off switch may break and need to be replaced. While most vacuum cleaners have different switches, the replacing process is quite similar between the various models. Check out this video tutorial if you’ve identified this to be the problem.
4. Motor Failure
Keep in mind that a defective motor is frequently caused by another problem, such as clogged filters or an overflowing vacuum bag. So, before you replace the motor, be sure there isn’t an underlying issue that is simply causing the motor to not function temporarily.
But if everything else is in top condition and the core of the problem is the motor itself, than you’re likely better off purchasing a new vacuum than having it replaced. Unless you’ve got a guarantee and can take it back to the shop for a free fix or replacement of course.
5. Motor Overheating
Consult your owner’s manual. Some current vacuum cleaners have a safety shutdown that turns off the motor if it gets too hot.
Place your hand near the motor on the casing. If it’s hot it’s very much possible that the vacuum shut down on its own. Wait five minutes before attempting to restart the vacuum. Of course, if you haven’t used the vacuum in a while, this can’t be the issue.
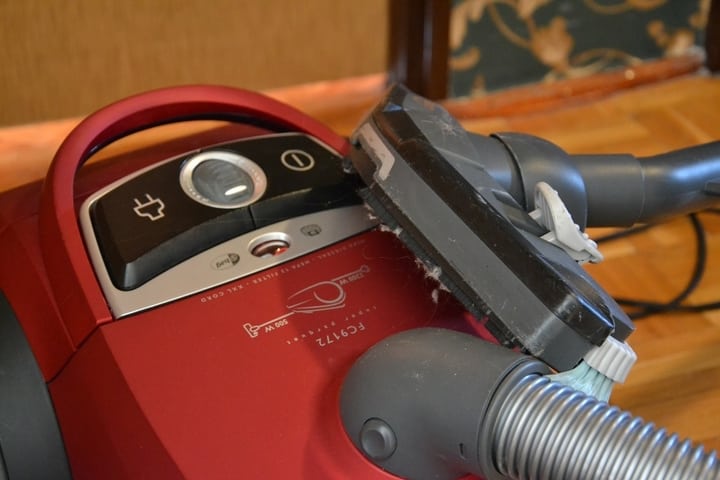
6. A Clogged Brush Wheel
Your vacuum may not turn on because of a clogged brush wheel so inspect it and clean it if you have to. Check the suction head’s brush roll as well. It’s possible that the vacuum cleaner won’t turn on because the roller is twisted and won’t spin.
Turn the vacuum off and clean or untangle the brush head if you can hear power going into the motor but the suction is still not operating. Restart the vacuum and check to see if the problem has been resolved.
7. Blockages in The Suction Area
Are there any stumbling blocks? The vacuum may not turn on if the air cannot flow. Examine the suction head, filters, and any tubing that may be present. If you discover blockage, you may have found the solution to your problem.
8. A Faulty Electrical Circuit
Another option is to follow the electrical path of your vacuum’s vacuum. For this, you’ll need a multimeter and a little bit of knowledge, but it can save you a lot of money on diagnostics. You will need to check for any open circuits in your vacuum by opening it up.
Begin with the circuits nearest to the outlet. From there, work your way to the motor. If you discover a faulty circuit, you can either repair it yourself or take it to a professional for repair.
9. Hair, Dirt and Debris Accumulation
Hair, dirt, and other debris that your vacuum collects might jam it up. Hoses, filters, and brush heads are all susceptible to clogging. Because clogging prevents air from easily passing through, your vacuum may not turn on.
Unclogging is a straightforward procedure. Take the following steps:
- Unplug the vacuum and turn it off.
- Meanwhile, empty the canister or bag.
- Take out the filter from inside. Because every vacuum is different, you may or may not have a filter that can be removed easily. Some filters are cylinder-shaped, while others are flat. Before attempting this step, read your instructions. If your vacuum won’t let you remove the filter, skip to the following step.
- Remove the filter and wash it. Using cold water, rinse the filter until it is dust-free. While it’s in the water, you should be able to gently compress it to assist dislodge the dust.
- Leave the filter to dry for at least 24 hours. Allow it to dry completely in the open air. If you use a hairdryer or other device to speed up the process, the filter may be damaged and rendered useless.
- Repeat steps 3-5 for each filter if you have more than one.
- Remove the clogs from the hoses. Because hoses are often in the shape of a U, clogged hoses are a common problem. Shine a light through the hose and lay it flat. It’s probably clogged if you can’t see light coming out the other side.
- Brush the brush head free of tangles. Hair, thread, and other items can tangle in the brush head, making it impossible for it to spin. Remove as much debris as possible by turning your vacuum over.
- Return the pieces to their proper locations.
Check to see whether your vacuum will turn on once you’ve completed these steps. Also, check out this full troubleshooting video guide if you require further assistance: